Administering with the Ops UI
The Ops User Interface (UI) is where you operate and administer Sovereign Home Cloud for the people who use it. You use the Ops UI to create their organizations, add their users, reset their passwords, and onboard the datacenters their event broker services will run in. The Cloud Console is where those users then create and manage their event broker services.
Sign in to the Ops UI as the Ops UI administrator, using the operator username and password from your values file. The administrator account manages every organization but does not use the Cloud Console itself.
Note: Sovereign Home Cloud does not send email. Whenever the Ops UI would offer to send one, such as for an invitation or a password reset, you must copy the link it generates instead and pass it to the user yourself, over a channel you trust.
Organizations
An organization is a separate tenant in the Cloud Console, with its own users, event broker services and datacenters. Users of one organization cannot see users in another organization. You can create as many organizations as you need, for example, one per team or business unit.
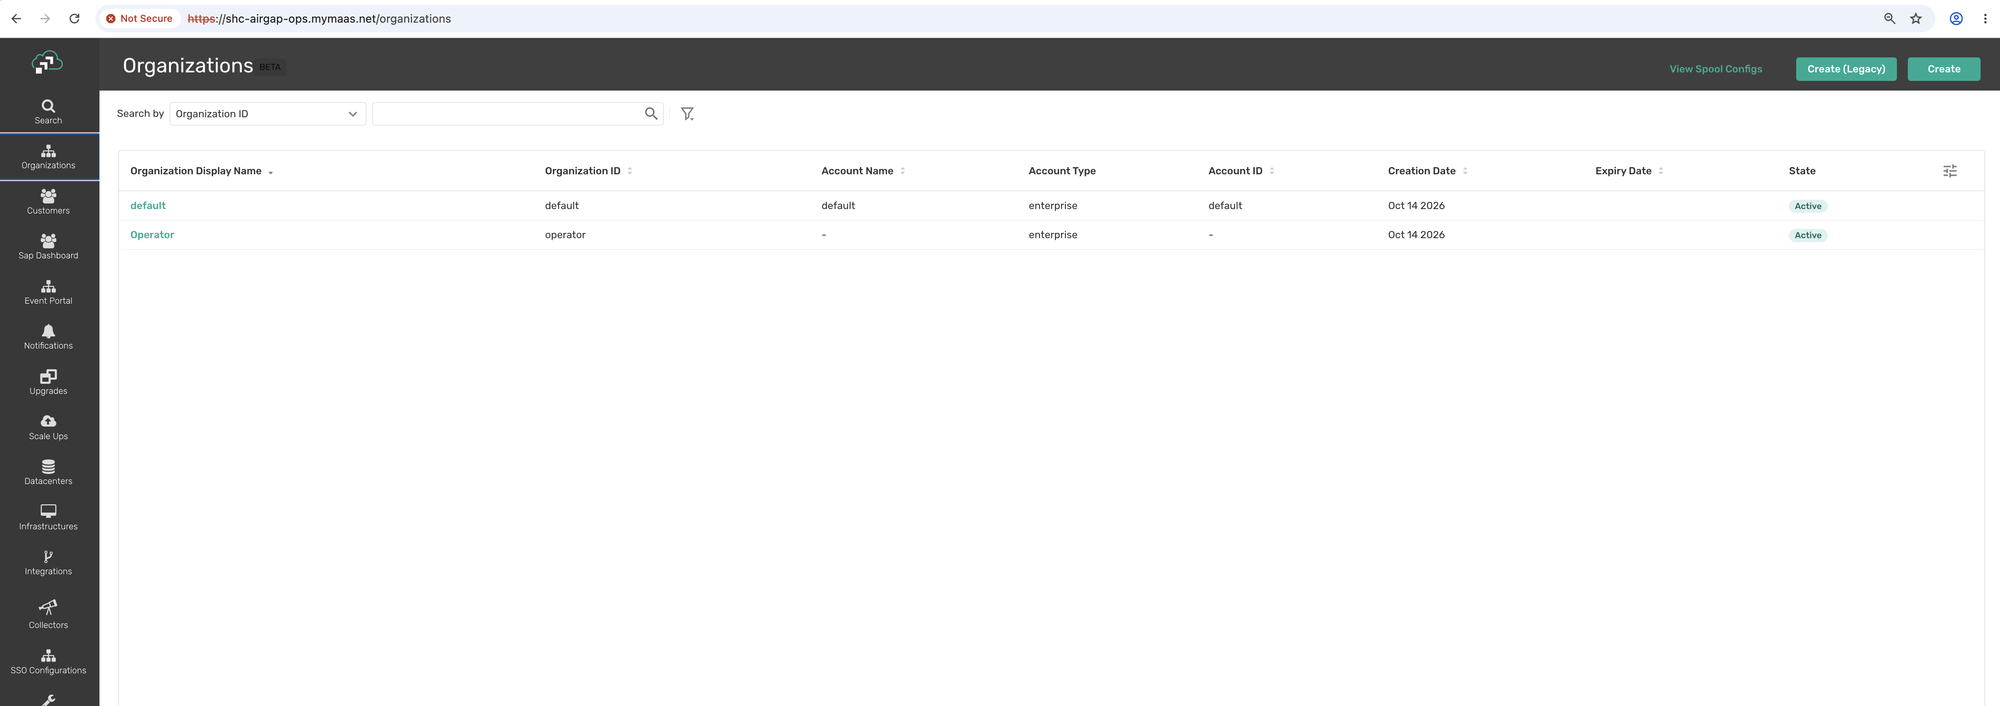
The Ops UI lists organizations under Organizations. Every installation has an Operator organization, which holds the Ops UI administrator role. Do not alter the Operator organization. The Quick Start also creates an organization named default.
Creating an organization
-
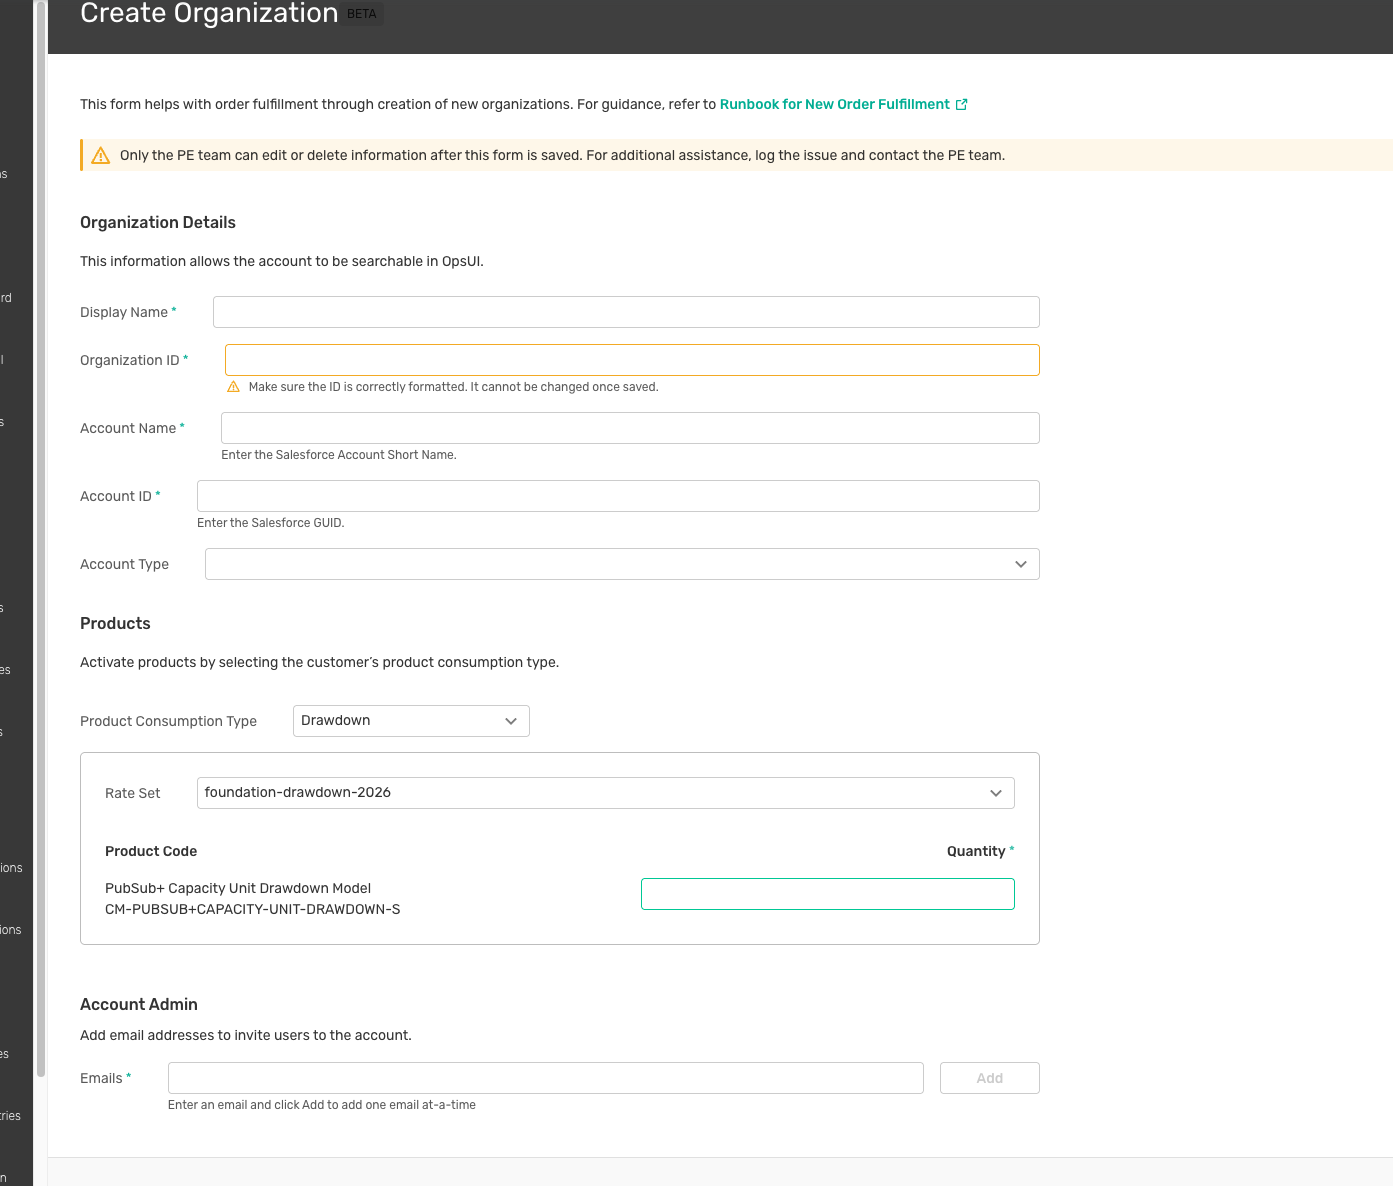
In the Ops UI, select Organizations and click Create. Don't use the Create (Legacy) option, as it uses an older form. The Create Organization form opens.
-
Under Organization Details, fill in:
Field Value Display Name The name users see Organization ID Lowercase letters and digits only. It cannot be changed once saved. Account Name Enter a meaningful name, for example the team's name Account ID Enter a meaningful ID, for example the team's ID. Spaces are not allowed in the ID Account Type Enterprise -
Under Products, leave the Product Consumption Type as
Drawdownand leave the Rate Set field with the value it populates with. In the Quantity field, enter any whole number from 1 to 99,999, for example5. The Quantity field is mandatory, but the number you select does not matter for a Sovereign Home Cloud deployment. - Under Account Admin, enter the email address of the organization's first administrator, and click Add. This creates the user with the
administratorrole. - Leave all other sections at their default values. The form's notes about Salesforce, the Product Engineering (PE) team and the runbook are written for Solace Cloud and do not apply.
- Click Review & Save. Review the details and then click Save.
- Send the first administrator their activation link; see Add a user.
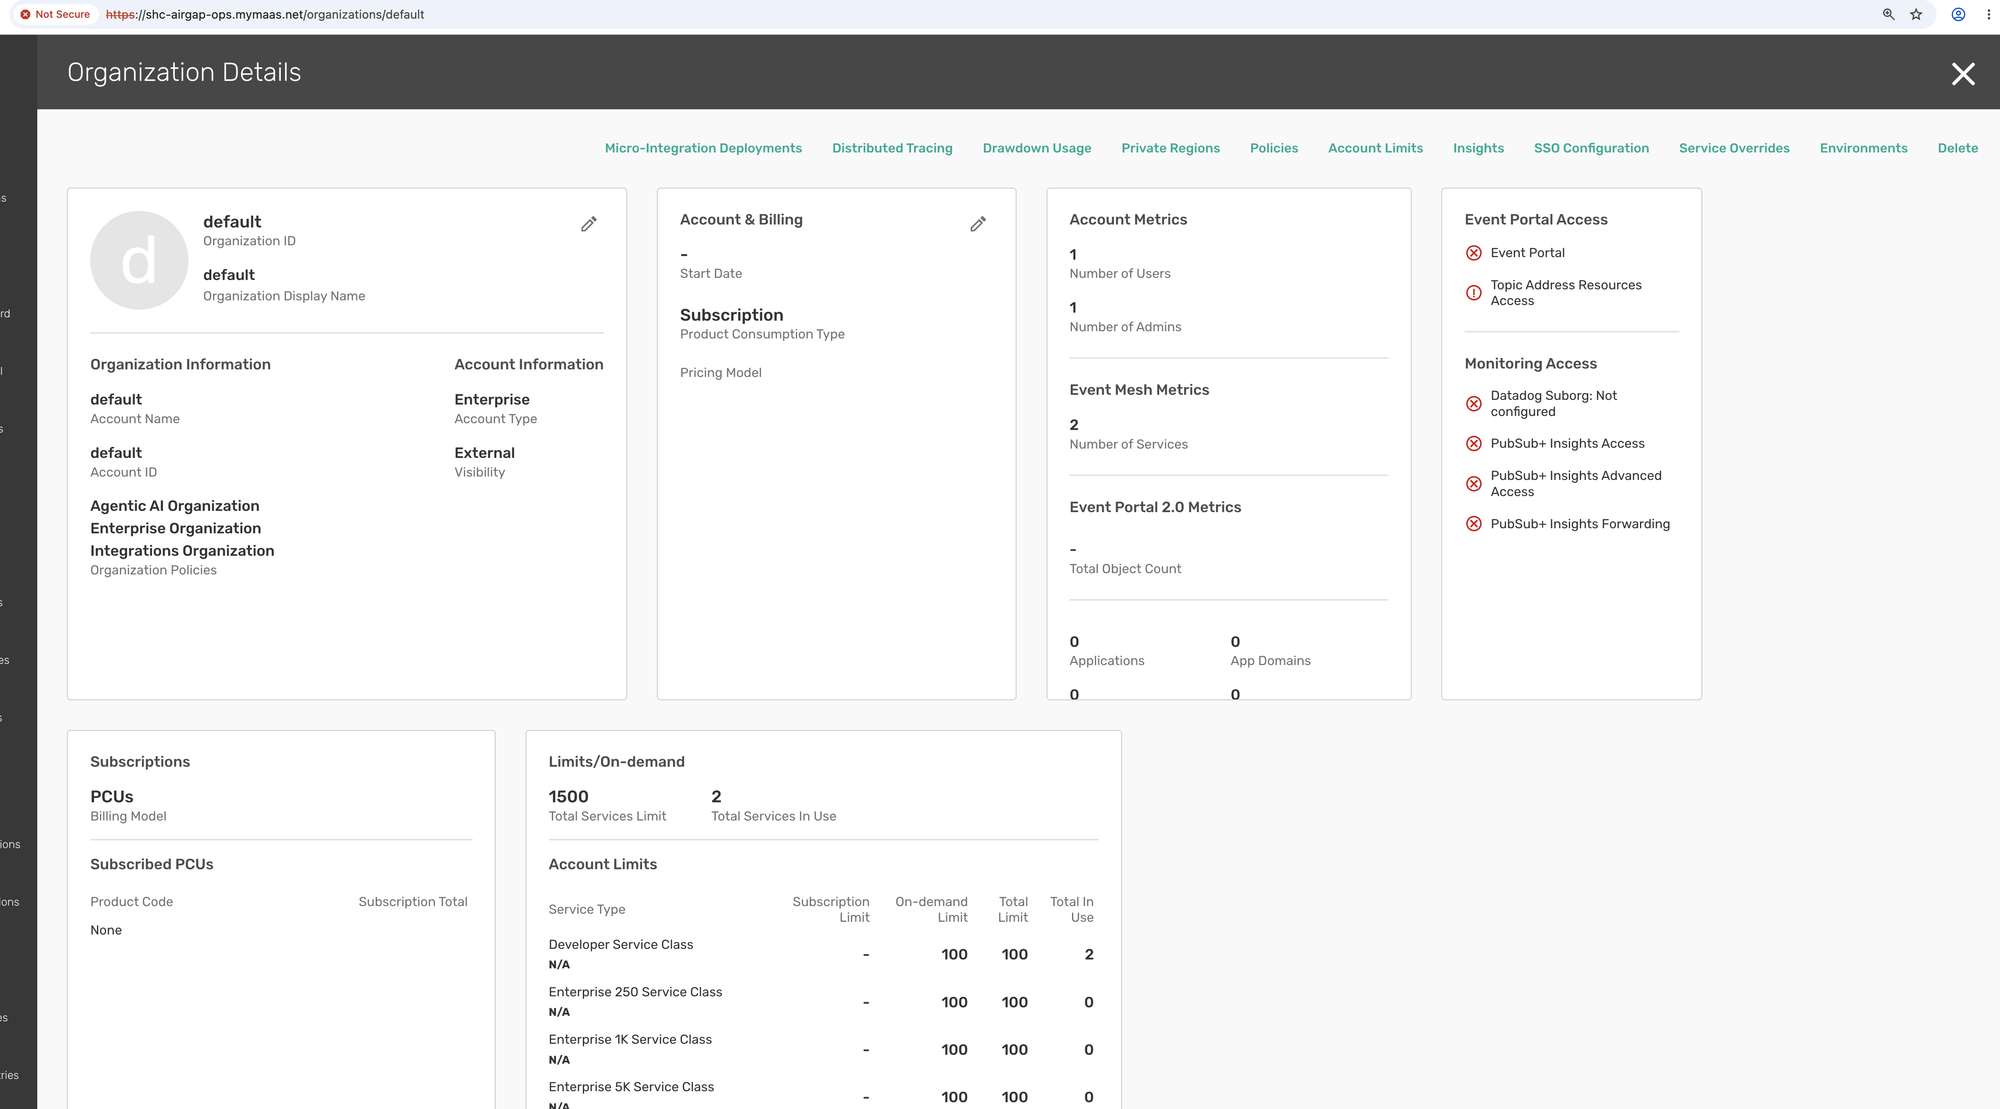
You can click an organization in the list to open its Organization Details page, where you can see its users, services and settings, as well as a menu along the top.
Users
An organization's users are listed under Users on the Organization Details page. In this section, you can view user status and roles.
Add a user
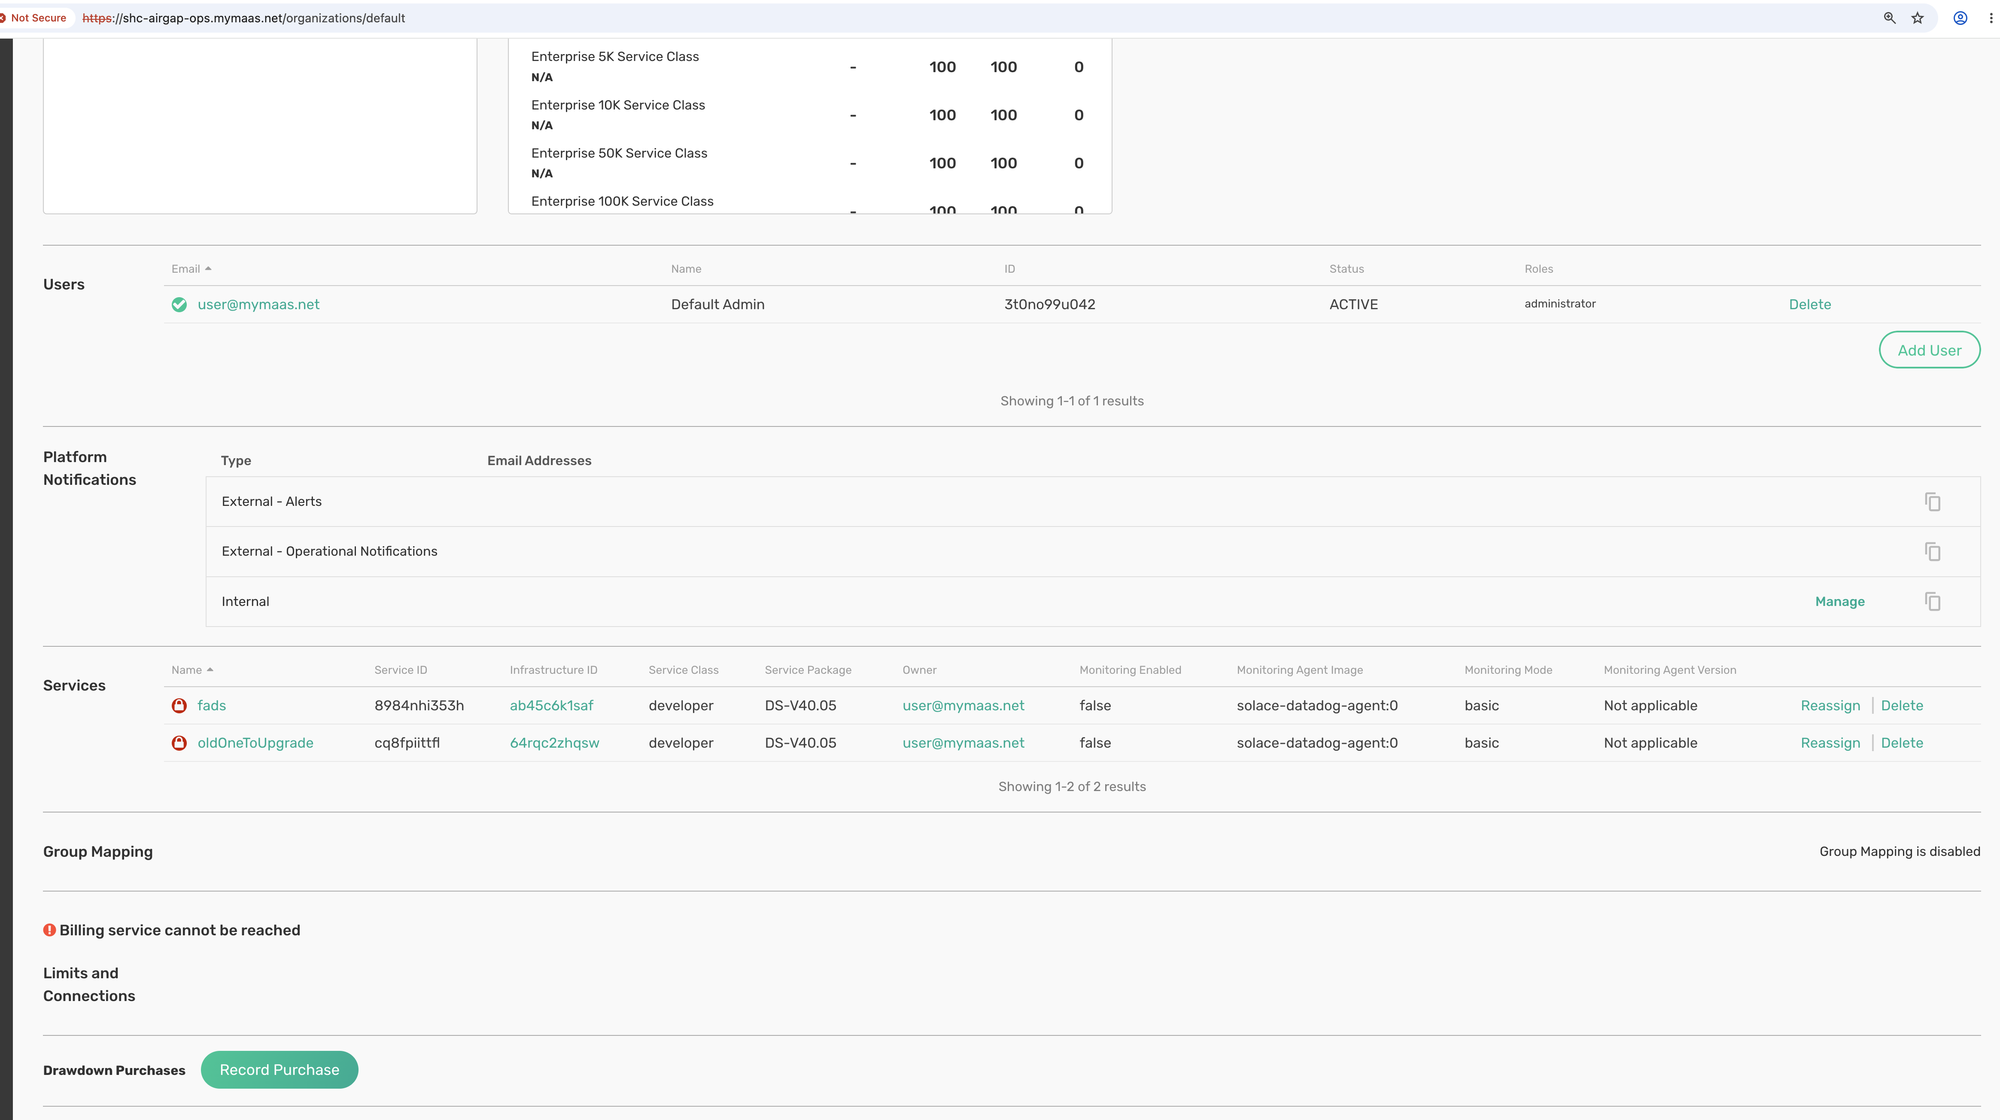
- On the organization's Organization Details page, under Users, click Add User. The Create User page opens.
- Enter the user's Email, and choose their User Roles. In an enterprise organization,
administratoris selected by default. Theadministratorrole lets the user manage the organization from the Cloud Console. - Click Create and Send Invite and confirm. No email is sent.
- Back under Users, click the user's email address to open the User Details page. Under Activation URL, click Copy To Clipboard and send the copied link to the user.
- The user opens the link, sets a password, and can then sign in to the Cloud Console with their email address.
Resend Activation on User Details sends an email and has no effect in Sovereign Home Cloud. You must copy the Activation URL again instead.
Reset a password
- Under Users, click the user's email address to open the User Details page.
- Under Password Reset URL, click Generate And Copy To Clipboard, and send the link to the user.
- The user opens the link and sets a new password.
The Forgot Password and Send Password Reset buttons send an email and have no effect in Sovereign Home Cloud. You must use the Password Reset URL instead.
Remove a user
A user who still owns event broker services cannot be deleted. Under Services, click Reassign next to each of their services and choose a new owner. Then, under Users, click Delete next to the user, and confirm.
Setting Up Single Sign-On
An organization's users can sign in to the Cloud Console through your OpenID Connect (OIDC) identity provider. Each SSO configuration has its own hostname: a prefix in front of your console's domain, such as team-a.<console domain>.
Before you start, the SSO hostname must already resolve to your Cloud Console. Create its DNS record in your DNS provider, for example Amazon Route 53, pointing to the same address as your console hostname. The prefix must be a single label: team-a, not team.a. The hostname is the prefix in front of your console's base domain: for a console at console.example.com, it is team-a.example.com. Your ingress certificate must also cover it; see DNS and TLS.
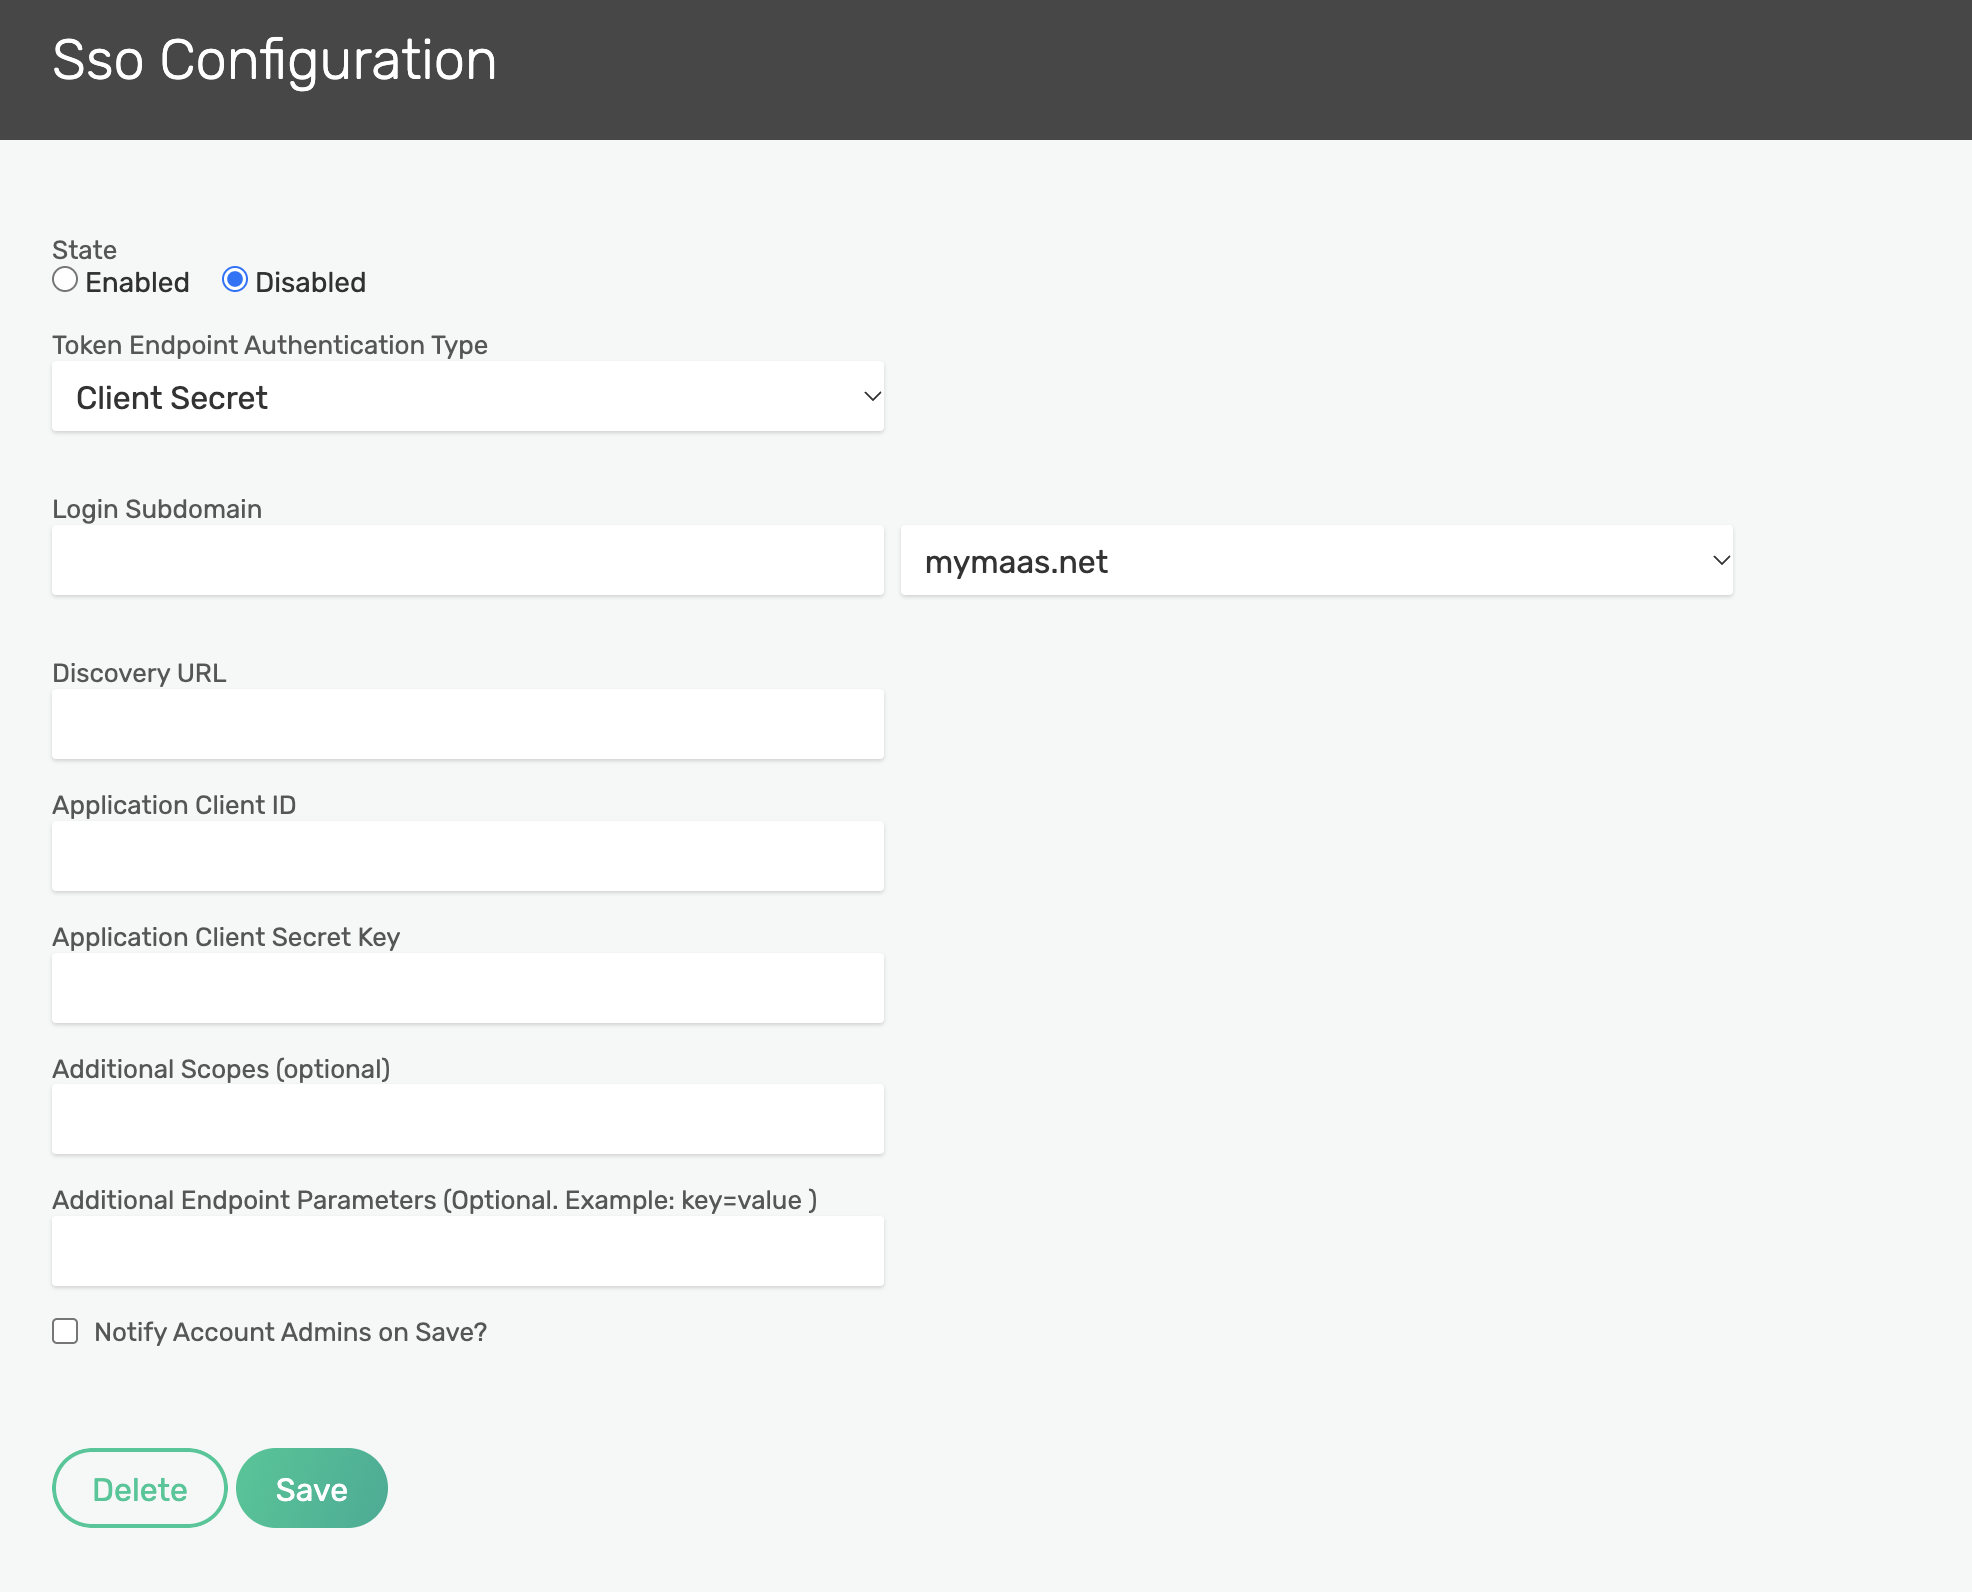
- In the Ops UI, select SSO Configurations and click Create.
- Set State to Enabled.
- In Login Subdomain, enter the prefix of the SSO hostname, for example
team-a. - Set Discovery URL, Application Client ID and Application Client Secret Key from your identity provider's OIDC application.
-
Set any of the optional fields you need, and click Save. Leave Notify Account Admins on Save? empty, because Sovereign Home Cloud does not send email.
-
Under Organizations, click the organization to enable SSO for.
- On its Organization Details page, click SSO Configuration in the top menu. Click Select SSO Configuration, choose the configuration you created, and click Update Organization.
-
Expose the SSO hostname. The chart's Ingress serves only the console, Ops UI and API hostnames, so create a second Ingress in the control plane's namespace that sends the SSO hostname to the same Service and ports as the console. Use the same
ingressClassNameasingress.classNamein your values, or leave it out where you leftingress.classNameblank.apiVersion: networking.k8s.io/v1 kind: Ingress metadata: name: home-cloud-control-plane-sso-team-a namespace: home-cloud-control-plane spec: ingressClassName: nginx tls: - secretName: home-cloud-control-plane-tls # must cover team-a.example.com hosts: [team-a.example.com] rules: - host: team-a.example.com http: paths: - path: /api pathType: Prefix backend: { service: { name: home-cloud-control-plane, port: { number: 8010 } } } - path: / pathType: Prefix backend: { service: { name: home-cloud-control-plane, port: { number: 9000 } } }The Service name is the chart's release name;
kubectl get svc -n home-cloud-control-planelists it. On OpenShift,secretNameis required, as for the chart's own Ingress. With the AWS Load Balancer Controller, give this Ingress the same annotations asingress.annotationsin your values, plusalb.ingress.kubernetes.io/group.nameon both Ingresses, so they share one load balancer; otherwise this hostname gets a load balancer of its own and your DNS record points at the wrong address. -
Open
https://team-a.example.comto sign in through the identity provider. An administrator of the organization then configures groups, roles and permissions; see Managing Users, Groups, Roles, and Permissions in the Solace documentation.
Datacenters
An organization's users create event broker services in datacenters listed under Private Regions. See Onboarding a Datacenter.